The Asphalt Shingle Roof Installation Process Explained Step by Step
People searching for asphalt shingle roof installation are usually looking to replace or upgrade their roof, and local contractors can expertly handle the entire process step by step.
Understanding the asphalt shingle roof installation process explained step by step can be a valuable resource for property owners considering a roof upgrade or replacement. Whether planning for a new build or replacing an aging roof, knowing what to expect helps ensure the project runs smoothly and aligns with your property's needs. Local contractors who specialize in asphalt shingle roofing can guide you through each stage of the process, providing clarity and confidence as you make decisions about your home's exterior.
For property owners in the area, exploring this topic offers practical insights into how experienced service providers approach roof installation, from initial preparation to final inspection. Gaining a clearer picture of each step can help you better evaluate proposals and understand the scope of work involved. Keep reading to learn more about how local service providers can help ensure your asphalt shingle roof is installed properly, offering durability and protection for years to come.
- New roof installation - homeowners planning to replace an aging roof can rely on local contractors to expertly handle the asphalt shingle roof installation process explained step by step.
- Roof replacement projects - those upgrading their current roofing system often seek local pros to manage each phase of the asphalt shingle installation with precision.
- Storm-damaged roof repair - after severe weather, property owners need local service providers to efficiently restore their roofs through the asphalt shingle roof installation process explained step by step.
- Roof renovation or upgrade - individuals looking to improve curb appeal and durability turn to local contractors familiar with the detailed asphalt shingle installation process.
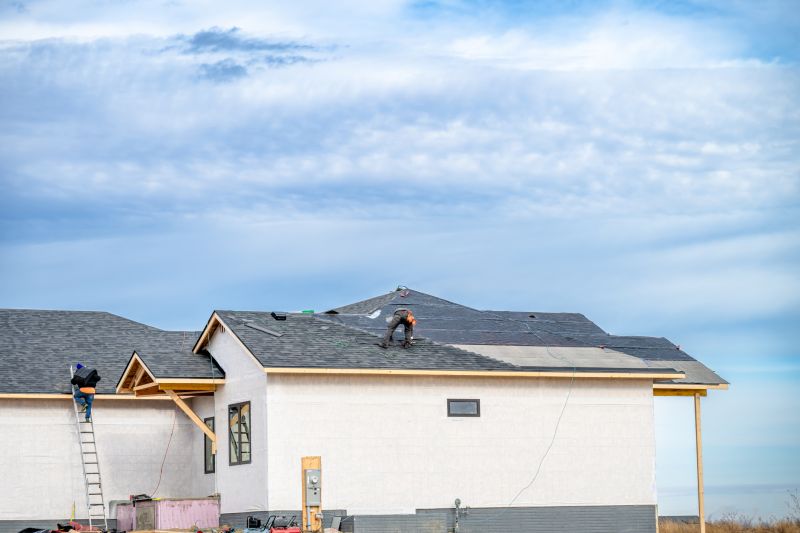
- New construction roofing - builders and developers rely on local pros to ensure proper installation of asphalt shingles during new building projects, following the step-by-step process.
When homeowners search for information about the asphalt shingle roof installation process explained step by step, they are usually looking to understand what the project involves from start to finish. This topic often comes up when planning a roof replacement or new installation, especially for properties that have aging or damaged roofing systems. People want to know how the process unfolds, what materials and techniques are used, and how long each stage takes. Understanding these details helps homeowners make informed decisions, prepare for the work, and set realistic expectations about the project’s scope and outcome.
The installation process is closely related to various roofing plans and concerns, including replacing an old roof, upgrading for improved durability, or ensuring proper protection against weather elements. Many property owners consider asphalt shingles because of their affordability, variety of styles, and ease of installation. The process also relates to addressing issues like leaks, storm damage, or the need for better insulation. Homeowners often seek guidance on how local contractors approach each step, from preparing the existing roof to installing new shingles, to ensure the work is done correctly and efficiently.
Typical properties that come up in discussions about asphalt shingle roof installation include single-family homes, multi-family residences, and small commercial buildings. These structures often have pitched roofs suitable for asphalt shingles, which are designed to fit a range of roof shapes and sizes. The process may vary slightly depending on the property type and roof complexity, but generally involves a series of systematic steps to ensure a durable and visually appealing result. Homeowners with these types of properties usually want to understand how local service providers handle each phase, from removal of old roofing layers to final inspections.
Understanding the asphalt shingle roof installation process explained step by step helps homeowners connect with local contractors who specialize in this work. These professionals can assess specific property needs, recommend suitable materials, and carry out each phase of the installation with attention to detail. Whether replacing an aging roof or installing a new one on a newly built property, knowing what to expect makes the process more transparent. It also helps ensure that the project aligns with the homeowner’s goals, and that experienced local pros are available to deliver quality results efficiently.
Roof Inspection Services - professionals who assess existing roofing structures and prepare surfaces, a key step in the asphalt shingle roof installation process explained step by step.
Roof Deck Replacement - contractors experienced in replacing or repairing roof decking, which is often necessary before installing new asphalt shingles.
Flashing Installation - specialists skilled in installing flashing around chimneys, vents, and valleys to ensure proper water runoff during shingle installation.
Weatherproofing and Underlayment Services - providers who install protective underlayments that serve as a critical layer in the asphalt shingle roof installation process explained step by step.
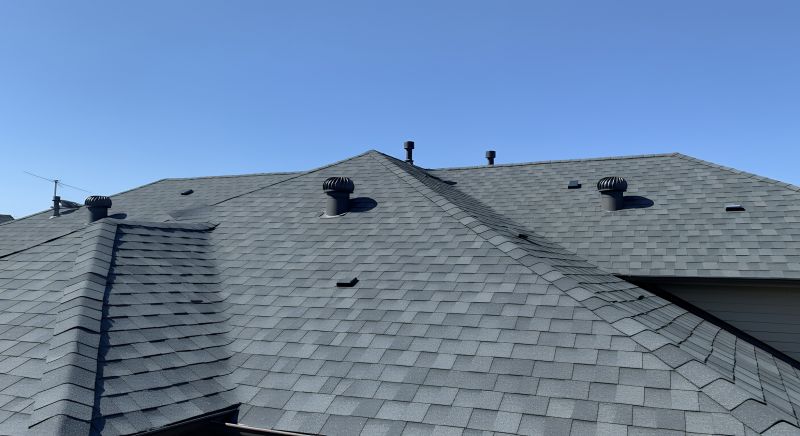
Roof Ventilation Services - experts who ensure proper attic ventilation, which is essential for the longevity of asphalt shingle roofs.
Gutter and Drainage System Installation - tradespeople who set up effective drainage solutions, supporting the overall integrity of a new roofing system.
When evaluating local contractors for asphalt shingle roof installation services, it’s important to consider their experience with projects similar in scope and complexity. Homeowners should look for service providers who have a proven track record of successfully completing roof installations comparable to the size and style of their own homes. Asking for references or examples of past work can provide insight into a contractor’s familiarity with the asphalt shingle roof installation process explained step by step, ensuring they understand the nuances involved and can deliver quality results.
Clear written expectations are essential when comparing local pros. A reputable contractor should be able to provide a detailed outline of the services they offer, including what is included at each stage of the installation process. This helps homeowners understand what to anticipate and ensures that both parties are aligned on project scope and responsibilities. Good communication from the outset can also indicate a contractor’s professionalism and commitment to transparency, making it easier to address questions or concerns that may arise during the project.
Reputable references and reviews are valuable tools for assessing the reliability and professionalism of local contractors. Homeowners should seek out feedback from previous clients to gauge the quality of work and the contractor’s ability to communicate effectively throughout the project. Consistent positive feedback often reflects a contractor’s ability to manage the asphalt shingle roof installation process efficiently and to meet expectations. Ultimately, choosing service providers who demonstrate experience, clear communication, and solid references can help ensure a smoother installation experience and a successful outcome.
Property owners often search for the asphalt shingle roof installation process explained step by step when they are planning practical projects around their homes and businesses. Local pros provide Asphalt Shingle Roof Installation services for everyday jobs and straightforward project options.
The asphalt shingle roof installation process explained step by step is a common topic for property owners who are considering replacing or installing a new roof. Many local residents look up this information to better understand what the project entails and to determine if hiring local contractors makes sense for their needs. Knowing the basic stages, such as preparing the roof surface, removing old shingles, installing underlayment, and laying down new asphalt shingles, helps property owners feel more informed about the work involved. This knowledge can also assist in making comparisons between different service providers and ensuring the chosen local contractors follow proper procedures during the installation.
Property owners often seek out this topic when planning for a roof replacement or upgrade, especially after noticing signs of damage or wear. Understanding the typical steps involved in asphalt shingle roof installation can clarify what to expect during the project and why it’s important to hire experienced local service providers. These professionals are equipped to handle each stage efficiently, from surface preparation to final inspection, ensuring the job is completed properly. Exploring this process can help property owners feel more confident in selecting the right local contractors to handle their roofing needs.
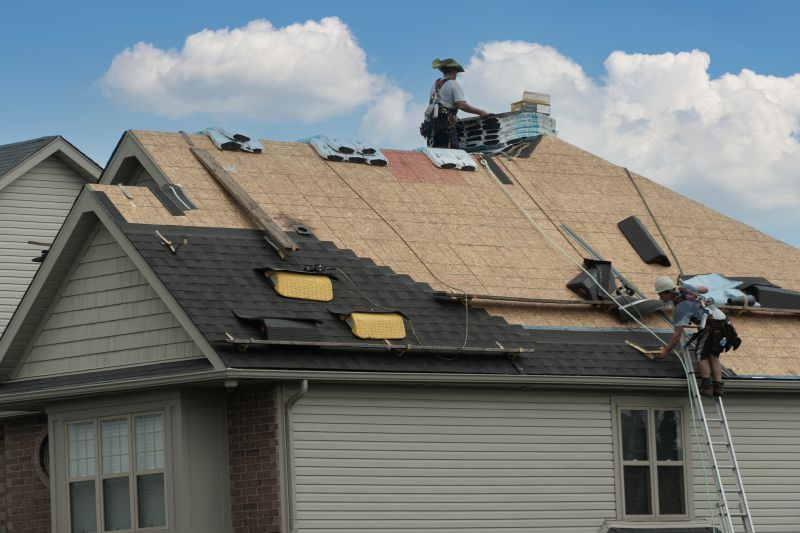
What are the main steps involved in the asphalt shingle roof installation process explained step by step? The process typically includes removing the old roofing, preparing the roof deck, installing underlayment, laying down the asphalt shingles, and finishing with sealing and inspection. Local contractors can handle each of these steps efficiently to ensure a quality installation.
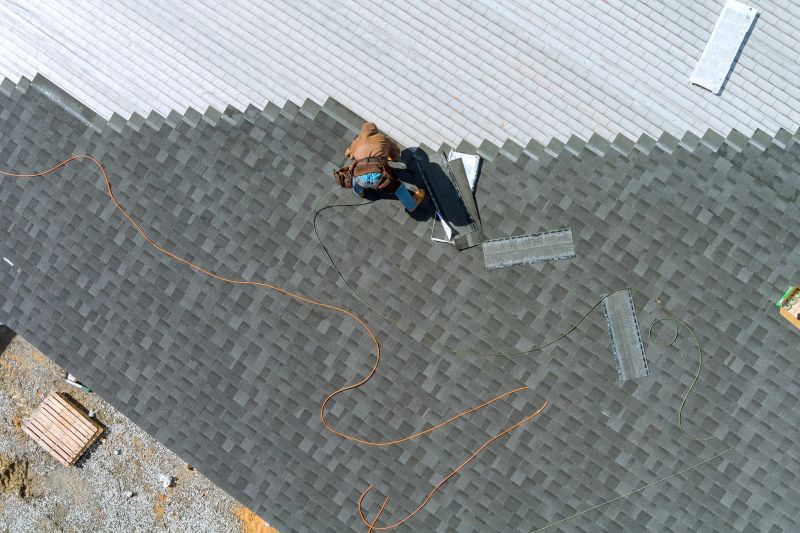
How do local service providers prepare the roof before installing asphalt shingles? They inspect the existing roof structure, remove any damaged materials, and ensure the roof deck is clean and properly supported. Proper preparation helps ensure the new asphalt shingles are installed correctly and last longer.
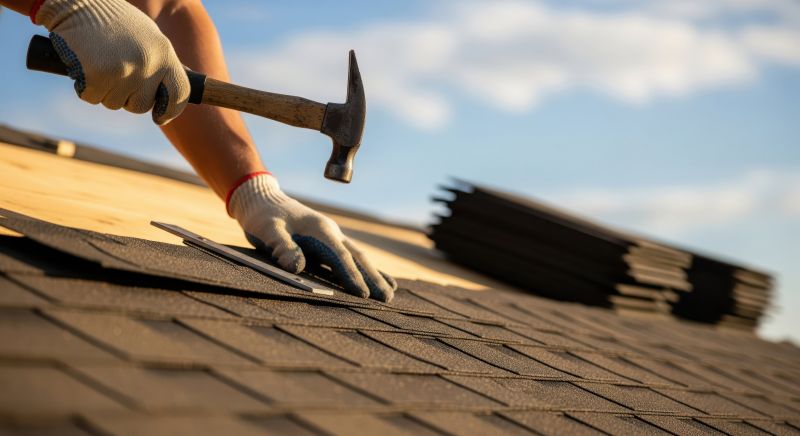
What materials and tools are used during the asphalt shingle roof installation? Materials include asphalt shingles, underlayment, nails, and sealants. Tools typically involve hammers, nail guns, ladders, and safety equipment. Local pros have the necessary tools and experience to complete the installation smoothly.
What is involved in the final steps of the asphalt shingle roof installation process? The final steps include sealing the shingles, installing ridge caps, and performing a thorough inspection to ensure everything is properly secured and aligned. This helps achieve a durable and visually appealing roof.
Why should homeowners consider hiring local pros for the asphalt shingle roof installation process? Local contractors bring experience with local building codes and conditions, ensuring the installation is done correctly and efficiently. They can also provide guidance tailored to the specific needs of the property.
Understanding the roof inspection process - property owners can prepare for their asphalt shingle roof installation by knowing what to expect during the initial inspection with local contractors.
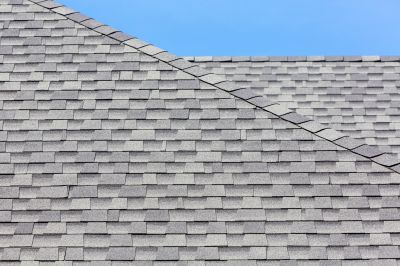
Selecting appropriate shingle styles and colors - choosing the right asphalt shingles can enhance curb appeal and match existing home exteriors, with guidance from local pros.
Planning for proper ventilation and insulation - considering ventilation needs during installation helps improve energy efficiency and roof longevity, with advice from local service providers.
Knowing the importance of quality underlayment and flashing - ensuring these components are correctly installed can prevent leaks and extend roof life, with support from experienced local contractors.
If you are thinking about the asphalt shingle roof installation process explained step by step for a property, this guide is meant to help you understand this topic, the typical project types, and how different options might fit your plans.
When you are ready, you can use the quote form on this page to share a few details about your project. From there, local pros can review the basics and follow up with options that match what you have in mind.